
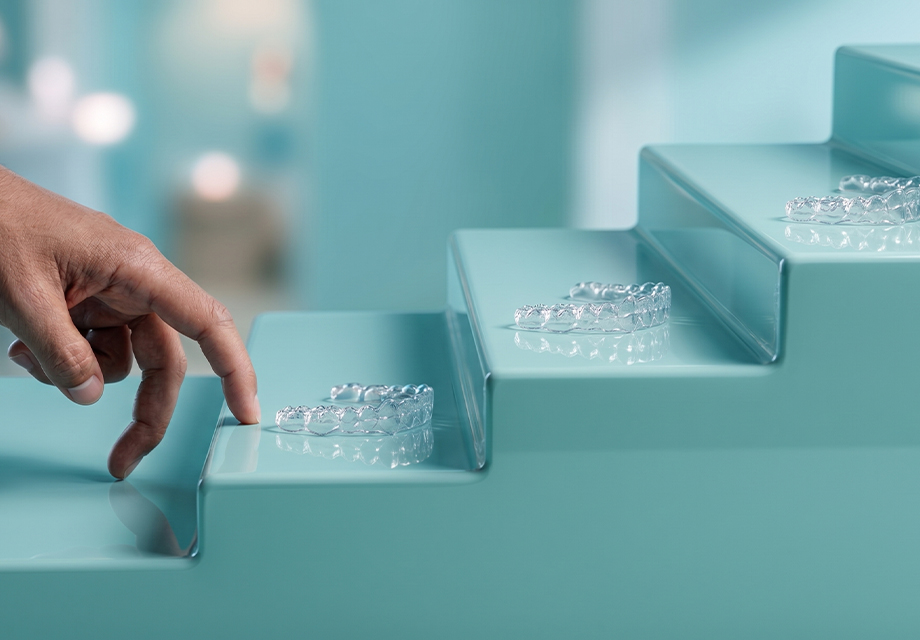
1. Welcome to Your Aligner Journey
Clear aligners are an orthodontic treatment that help move teeth to a more ideal position both functionally and esthetically. [1] Unlike traditional fixed appliances, it is a removable, esthetic option that can give you the results you need while not being very visible.
It is worth noting that every patient and case is different. When you meet with your dentist, he/she might suggest clear aligners for your case if they deem it as an appropriate option. If that happens, this blog may help you understand the process, what to expect throughout the treatment, and what are the procedures to be expected. It is crucial to understand your doctor’s instructions and recommendations as clear aligners are a commitment. The results will directly depend on your consistency and compliance and understanding of the treatment.
2. Scans & Records
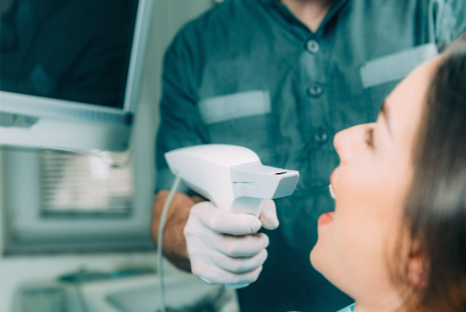
Once it is decided that your case is appropriate for aligner treatment and you want to move forward with the treatment, it is expected that your doctor will take photographs to track your progress. Furthermore, your dentist will need to take impressions or scans of your teeth. This might be done either using a dental impression material to take a physical impression of your teeth or using a dental scanner to get a digital scan of your teeth if a scanner was available.
Your doctor should then complete a prescription form and submit it along with your records to Eon Aligner. The clinical team at Eon Aligner will then create your customized treatment plan based on your records and your doctor’s prescription. Once it's ready, the treatment plan will be sent to your doctor who may review it with you to explain your planned treatment setup and your expected treatment outcome. If you both agree and are satisfied with the plan, the plan can then be approved and the aligners will be shipped to the clinic so you can start your aligner journey.
3. Receiving Your Aligners – First Appointment
Once your aligners arrive at your doctor’s clinic, you’ll be scheduled for your first appointment. During this visit, the dentist will start with checking the fit of the attachment template and the first aligner to ensure everything fits properly. If any adjustments are needed, they will be made before the treatment begins.
3A. Interproximal Reduction (IPR): Making Space for Tooth Movement
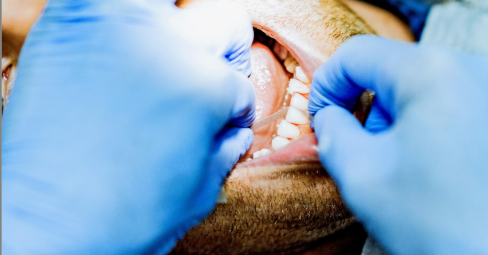
The doctor will then proceed to check if there are any attachments or interproximal reduction (IPR) that is scheduled to be done on the first step. If so, the doctor will usually start with the IPR process. To learn more about IPR, check out this blog.
IPR is a process that gently removes a small part of enamel between teeth in order to create space for teeth movement. [2] This is important in some cases as aligners are considered a “closed-system” and space needs to be created for some movements to occur predictably. [2,3] This is especially important with crowding cases where the arch needs a lot of space.
The process does not usually require the need for anesthetics and is considered a mild process although some pressure is to be expected. Because IPR is meant to create some space, you may notice some small gaps in between your teeth. It is important to note that this is part of the process, and these gaps are created with the intention to close them throughout the treatment. This is all to say that the gaps are not meant to be permanent and will close by the end of the treatment. [2]
3B. Attachments: Small Composite Extensions That Help Your Teeth Move
If your case requires attachments, the doctor will proceed with placing them after completing any required IPR. Similar to IPR, placing attachments is a simple process and should not be painful. To learn more about attachments in detail, you may read our blog.
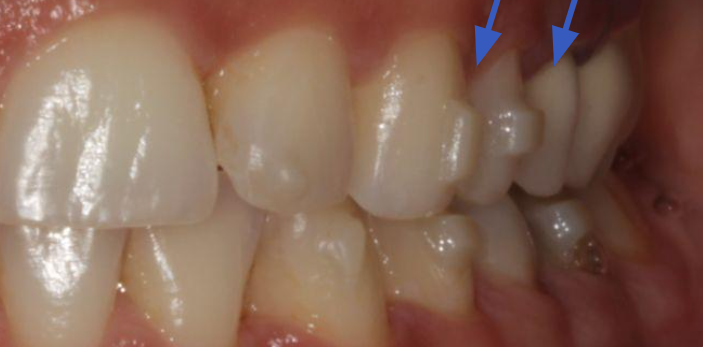
Attachments are small, tooth-colored composite extensions usually placed on the front surface of the tooth. They are designed to be discreet and serve two purposes: one is to add retention and ensure your aligner stays in place, the other is to help make certain movements more predictable. [1,4]
To place the attachments, your doctor will use the attachment template included with your aligners. After checking the template’s fit, your teeth will be cleaned and prepared. A bonding process is then used to secure the composite material onto the teeth requiring attachments, after which the template is placed and light-cured to place the attachments.
It is important to note that after this process, the doctor will check the attachments. Then, if “excess flash” i.e. extra composite which flowed around the attachment is detected, the doctor will use a bur to clean around the attachments and remove the excess composite. Also, the doctor will recheck the fit of the first aligner after attachment placement to ensure the fit is still good.
3C. Elastics & Button Placement
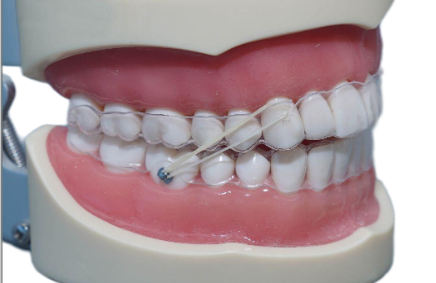
Depending on your plan, your doctor may recommend elastics as part of your aligner treatment. Elastics are an auxiliary tool used in adjunct to clear aligner treatment to make movements more predictable. [5] They are rubber bands that attach to the aligner system through buttons and/or precision cuts in the aligner itself.
The procedure will usually entail a button placement. Like IPR & attachments, the procedure is mild and not invasive. It is a similar procedure to attachment placement, however instead of a composite extension, a “button” will usually be placed on the front surface of the tooth where the elastic should extend from. This is slightly more visible than attachments as this is usually a metal button, however, it is usually placed in posterior teeth or teeth towards the back of your jaw which makes them less visible.
Once placed, the doctor will show you and practice with you how to place and remove the elastics. If you want to see a video guide on how to wear your elastics, you watch the video through this link. It is important to note that compliance in wearing the elastics as instructed is crucial. Consistency is wear will lead to better results.
3D. Instructions on wear cycles, hygiene & follow-up appointments
Once all required procedures are complete, your doctor will show you how to properly place and remove your aligners. For a video guide on putting on and removing aligners, you may watch this video.
The doctor will also instruct you on the appropriate wear cycle for your treatment plan. Most Eon Aligner cases follow the 1-week wear cycle. This means that the aligners are changed every week. Your doctor will also advise you to wear your aligners for a minimum of 22 hours per day. [6] That means that aligners should only be removed during meals and for oral hygiene practices. Compliance with aligner treatment and wear time is essential for the success of the treatment so it is important to listen to your doctor’s instructions.
Finally, the doctor will explain how to clean your aligners and book your next follow-up appointment. For a video guide on the process of cleaning aligners, you may watch this video.
4. Changes You May Notice Along the Way
Now that you have a better understanding of how the process will look and what to expect in your first appointment, we can move to the next step which is what to expect after you leave the dental office.
It is normal to experience slight pain or discomfort in the first few days.[7] This pain usually settles within a few days. It is possible to use some painkillers to help throughout the initial adjustment and pressure.
It is also expected that you may experience some temporary speech changes. [8] A slight lisp is common especially with new aligners. This also usually improves as you adapt and get accustomed to the aligners and should not be noticeable after the first week.
Finally, you should be aware that some cases require the teeth to look slightly different or worse before they look better. This is a normal part of the process and may be attributed to multiple factors including the previously mentioned small gaps from IPR or changes due to staging of movements. In some treatment plans or cases, there might be a need to move certain teeth first so others can have more space to move. This means that some gaps or spaces may occur before the teeth are moved back to their ideal position. The most important thing is to trust the process and stay diligent with aligner wear and all these changes will be fixed throughout the treatment.
5. Keeping Your Treatment on Track
Tracking is a way to check that the treatment plan is progressing as planned. This can be checked by the dentist in the follow-up visits by comparing your current tooth movements with the planned treatment setup. However, it is also important for you as a patient to check the fitting and tracking of your aligners.
Usually, if the aligners are being worn as prescribed, are being cleaned, follow-up appointments are being attended and you are not skipping aligners or switching too early, then your case should track as planned. [6] However, if you want a guide that helps you check if your aligners are properly fitting, you may check out this video and blog.

6. Refinements: The Final Touches
Refinements are additional steps that may be needed by many patients after the initial treatment in order to achieve the final touches. [1] This is a normal part of the process that helps fine-tune any remaining discrepancies to reach the ideal result. This does not mean that the treatment has failed, but rather is a normal part for achieving the best possible result.
It is important to note that this will require new scans or impressions to be taken before moving forward. To get a better understanding of what refinements are, you may read this blog post.
7. Retainers: Maintaining Your New Smile
The final step of your clear aligner journey is maintaining these results. This is done by ensuring you wear your retainers post-treatment. Once your treatment is complete, including any refinement phase if needed, retainers help prevent your teeth from shifting back toward their original positions.
Your doctor will bring you in for an appointment and ask to take scans of your teeth to send to Eon Aligner in order to send your retainers. To read more about retainers, check out this blog. The doctor will give you instructions on wear time and how to keep your results for the long-term and to keep celebrating your new smile!
FAQS
.svg)

References
Related Articles

Travel-Friendly Clear Aligner Care: Tips for Patients on the Go
.webp)
Oral Hygiene Routine Steps & All the Instructions to Have Healthy Teeth
What to Expect During Your Clear Aligner Journey
.svg)
© Eon Aligner Copyright 2023 All rights reserved


